NATURAL DYES WORKSHOP AND YELLOW ONION SKIN DYE RECIPE
The natural dyes class this month was a blast! 21 women joined us at a sweet urban ranch in Carpinteria. After proper introductions were made, we learned all about natural dyes made from plants, and what colors we could expect to get, we got started.

Everyone chose to dye either four cotton napkins, or two cotton napkins and one silk scarf. Everyone got her fabrics in the eight simmering pots of plant dyes, which included coyote brush, ironbark eucalyptus, toyon, fennel, onion skin, cherimoya leaf, blackberries, and cochineal. All of the dyes besides the cochineal were harvested within a few miles of where we were standing.
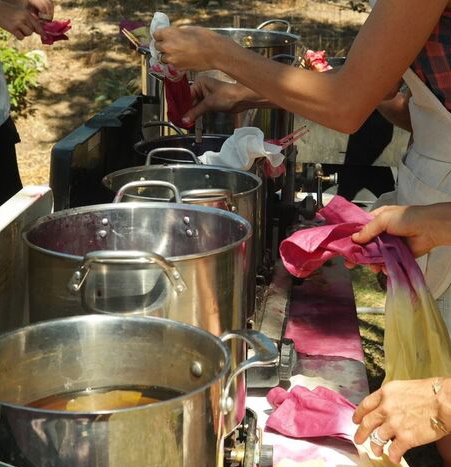
We left our fabric to soak up color as we headed back inside for some of Emma's delicious food. She artfully created delicacies made from some of the plants we used for dyeing. While everyone ate we got down to business about the basics of dyeing with plants. We talked about the whole process, from identifying and harvesting the plants to scouring and mordanting different fabrics, making the plant dyes to afterbaths and color modifiers. I wanted to make sure everyone left with the information and confidence to harvest and prepare her own plant dyes at home. Next, we went back outside to find our fabrics had turned all kinds of beautiful shades of red, pink, orange, yellow and light green.
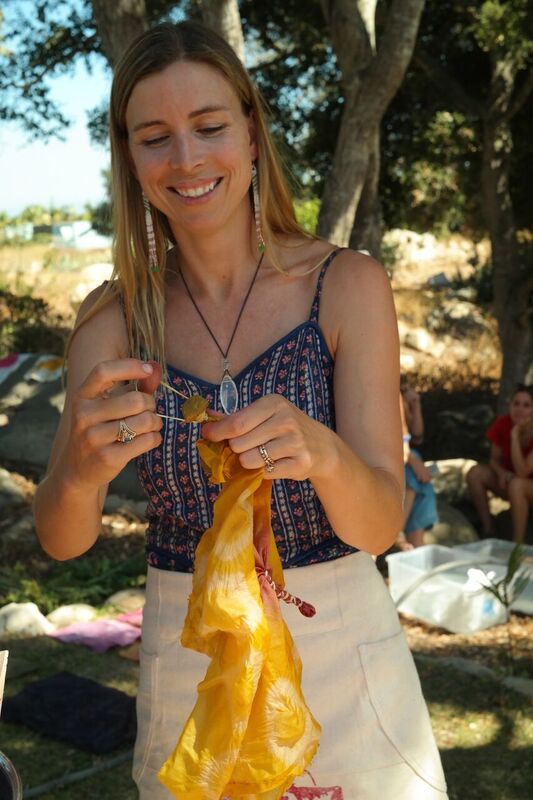
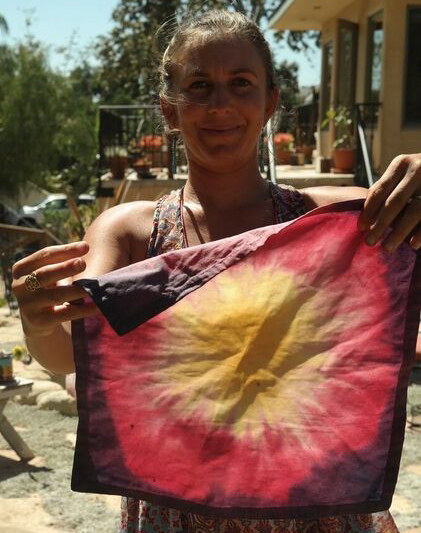
This was when the real fun started. We used rubber bands and pebbles, knots and folds, droppers and clothespins to make different patterns on the fabric. We dipped our dyed silks and cotton into different dyes, making beautiful color combinations. Then we dipped our fabric into two color-modifying afterbaths- a rusty nail iron bath and a wood ash bath, to create an entirely different color palate, with shades of olive green, gray, orange, brown and purple. I was blown away by how varied and beautiful everyone's fabric turned out.

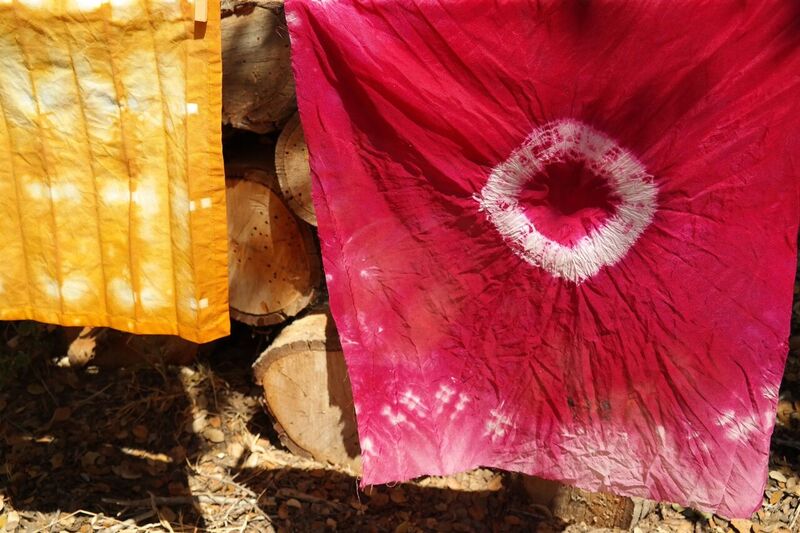
I loved how all of the napkins and silks looked when we hung them up to dry.
Everyone left with a workbook of all the information we covered during the day, as well as the beautiful works of art she made at the workshop. Plants were provided for those who wished to make dyes right away after coming home. It was a full and fabulous day that left me feeling excited for more dyeing workshops. I hope everyone had as much fun as I did!
In case you missed the class, here is how to make a yellow onion skin dye at home:
Yellow onion skins make a beautiful, rich yellow dye bath. You can use this dye to color silk, cotton, Easter eggs, or even use it instead of plain water when you make play dough.
To make the dye:
Save your yellow onion skins in a paper bag until you have a good pile. The amount of time this will take depends on how many onions you use to cook with at home. Once you have a couple of big handfuls-worth,
Fill a pot 1/4 full with the skins. (You can also use red onion skins, or a mixture of both red and yellow.) Then fill the pot with water. Heat until it becomes steamy, then turn the heat down to simmer.
Let this mixture simmer for one hour, then turn off the heat. Cover your pot and leave everything for eight hours, or overnight.
The next morning, bring your dye bath up to a simmer again, add your fabric, give a stir, then let it simmer for 30 minutes to an hour. By this time your fabric should have a nice rich yellow color.
Carefully remove it from the dye bath (it will be hot!) and hang it to dry. Once it has dried completely, you can give it a rinse, let it dry again, and it is ready to go!
Happy dyeing!
Love, Ashley
Photos by Carrie Paine